

Paninis are one of those rare foods that feel both comforting and a little special. You get the crunch of toasted bread, the savory pull of melted cheese, and layers of flavor that somehow taste more “finished” than a regular sandwich. The best part? Once you understand a few simple principles—bread choice, moisture control, heat management, and smart layering—you can make paninis at home that rival your favorite café.
In this guide, you’ll learn what truly makes a great panini, how to build one that doesn’t get soggy, which ingredients work best together, how to use a panini press (and what to do if you don’t have one), plus advanced techniques for next-level crispness and flavor. Whether you’re a beginner making your first pressed sandwich or you want to refine your technique, this will take you from basic to confidently creative.
What Are Paninis (And What Makes Them Different)?
A panini is a pressed, toasted sandwich—typically made with hearty bread and cooked on a grill or press until crisp on the outside and warm and melty inside. While many people associate paninis with Italian-style breads and ingredients, “panini” has evolved in everyday cooking to mean any hot pressed sandwich.
What sets paninis apart from other hot sandwiches is the combination of pressure and direct heat. Pressing creates tighter contact between the bread and fillings, which helps the cheese melt evenly and produces that signature crisp exterior. Done right, it’s crunchy without being dry, rich without being greasy, and neatly layered rather than falling apart.
Why Paninis Work So Well: The Simple Food Science
Great paninis aren’t magic—they’re smart physics and flavor balance.
First, the high heat toasts the bread quickly, creating a crisp crust while keeping the inside tender. Second, pressure compresses the fillings so they heat evenly and don’t slide around. Third, fat and protein (cheese, meats, olive oil, butter) carry flavor and create a satisfying mouthfeel. Finally, contrast is everything: crunchy bread against creamy cheese, salty cured meats against bright pickled vegetables, smoky grilled chicken against a tangy sauce.
Once you build around these principles, your paninis stop being “random sandwiches that got pressed” and start tasting intentionally crafted.
Essential Equipment for Making Paninis
Panini Press (Best Option)
A panini press heats from both top and bottom and applies gentle pressure. It’s the most consistent tool for crisp grill marks and even melting. Look for one with adjustable height so you can press thicker sandwiches without smashing all the filling out.
Cast-Iron Skillet or Grill Pan (Excellent Alternative)
You can make outstanding paninis using a skillet plus a weight (another pan, a foil-wrapped brick, or a heavy pot). The key is steady medium heat and patience.
Oven + Skillet Combo (Best for Very Thick Paninis)
Sear the sandwich in a skillet for crispness, then finish in the oven so the center heats through without burning the bread.
Helpful Extras
A thin spatula for flipping, parchment paper for cleaner pressing, and a serrated knife for a clean cut that doesn’t crush the crust.
The Best Bread for Paninis (And What to Avoid)
Bread can make or break paninis. You want something sturdy enough to press and toast without collapsing, but not so hard that it turns into jaw workout.
Top Bread Choices
Ciabatta is a classic: crisp crust, airy interior, sturdy structure.
Focaccia brings richness and flavor, especially with herbs.
Sourdough gives you tang and a crackly crust (amazing for meat-and-cheese combos).
Baguette works well if you choose a not-too-hard loaf and slice it lengthwise.
Rustic country loaves are great for hearty, deli-style paninis.
Bread to Use Carefully
Very soft sandwich bread tends to compress too much and can turn dense or greasy. Thin sliced bread can work for “panini-style grilled sandwiches,” but you’ll want gentler pressure and lower heat.
Bread Tips That Instantly Improve Results
Slice evenly so the sandwich presses uniformly.
Aim for medium thickness: too thin dries out; too thick won’t heat through.
If your bread is very fresh and soft, lightly toast the inside faces first to reduce sogginess.
How to Build a Panini That’s Crisp, Melty, and Not Soggy

Paninis fail for a few predictable reasons: too much wet filling, sauce applied incorrectly, cheese placed poorly, or cooking too hot. The fix is a smart layering strategy.
The Best Layering Method (Use This as Your Default)
Bread
Cheese (acts as a “glue” and moisture barrier)
Protein (meat, chicken, tofu, roasted veggies)
Vegetables (roasted or patted dry if juicy)
Sauce (thin layer, away from the bread when possible)
Cheese (optional second layer for extra melt)
Bread
Cheese near the bread helps seal it. Wet ingredients should be buffered by cheese or meat, not pressed directly against the bread.
Sauce Rules for Paninis
Use thicker spreads like pesto, tapenade, aioli, mustard, or hummus.
If using juicy sauces (tomato sauce, salsa), use a thin smear and keep it toward the center.
For oil-based sauces, go light—too much turns the crust greasy rather than crisp.
Choose Fillings That Improve With Heat
Paninis shine with ingredients that become better when warmed: mozzarella, provolone, cheddar, fontina, roasted peppers, caramelized onions, mushrooms, grilled chicken, ham, salami, turkey, and sturdy greens like spinach.
If you love delicate greens like arugula, add them after cooking for a fresh peppery bite.
Cheese for Paninis: Meltability Matters
Cheese isn’t just flavor—it’s structure. The best paninis usually rely on one excellent melting cheese plus one “character” cheese for depth.
Best Melting Cheeses
Mozzarella (especially low-moisture for less sogginess)
Provolone (smooth, classic panini melt)
Fontina (luxurious and creamy)
Gruyère (nutty, melts beautifully)
Cheddar (great flavor, use medium-sharp for best melt)
Havarti (very melty and mild)
Stronger Cheeses (Use as Accents)
Parmesan, pecorino, blue cheese, feta, goat cheese—these add punch but can dry out or separate if used alone. Combine with a melty base cheese for the best texture.
Step-by-Step: How to Make Paninis (Press or Skillet)
Method 1: Panini Press
- Preheat the press fully. A properly hot press prevents sogginess and creates crispness fast.
- Assemble your sandwich with balanced fillings and minimal excess moisture.
- Lightly brush the outside of the bread with olive oil or softened butter. Oil gives a crisper finish; butter gives deeper browning and flavor.
- Place the sandwich on the press and close gently. Don’t slam it down—let the bread compress naturally.
- Cook until deeply golden and the cheese is melted, typically 3–6 minutes depending on thickness.
- Rest for 1–2 minutes before slicing. This keeps the cheese from running out immediately.
Method 2: Skillet + Weight
- Heat a cast-iron skillet over medium to medium-low. Too hot burns the bread before the center warms.
- Brush the bread exterior with oil or butter.
- Place the sandwich in the pan. Add a weight (another skillet or heavy pot). Press gently.
- Cook 3–5 minutes per side, checking browning.
- Flip carefully, reapply the weight, and cook until the cheese is fully melted.
- Rest briefly, then slice.
Method 3: Skillet + Oven (For Thick or Cold Fillings)
Sear both sides in a skillet to brown, then move the sandwich (skillet-safe or onto a tray) into a preheated oven until the center is hot and the cheese is fully melted. This method is ideal for thicker breads, large sandwiches, or fillings straight from the fridge.
Practical Insights: Timing, Temperature, and Texture
If you want paninis that taste like they came from a café, focus on these practical details.
Preheat matters more than people think. A lukewarm press steams the bread before it can toast, which leads to softness and sogginess.
Medium heat is your friend in a skillet. High heat creates bitter dark spots while the cheese stays stubbornly unmelted.
Resting is not optional. Give the cheese a moment to set so you get clean slices and better bite.
Control moisture aggressively. Pat roasted vegetables dry, drain pickled ingredients, and avoid watery fresh mozzarella unless you slice thin and blot it.
Flavor Combinations: Panini Ideas That Always Work
Below are proven panini combinations you can use as templates. Mix and match based on what you have.
Classic Italian-Style Panini
Ciabatta, mozzarella, prosciutto or salami, roasted red peppers, basil, and pesto. Keep pesto thin and consider adding a few spinach leaves for extra body.
Turkey, Cheddar, and Apple Panini
Sourdough, sliced turkey, sharp cheddar, thin apple slices, and a swipe of Dijon or honey mustard. The apple adds crunch and brightness that cuts through the richness.
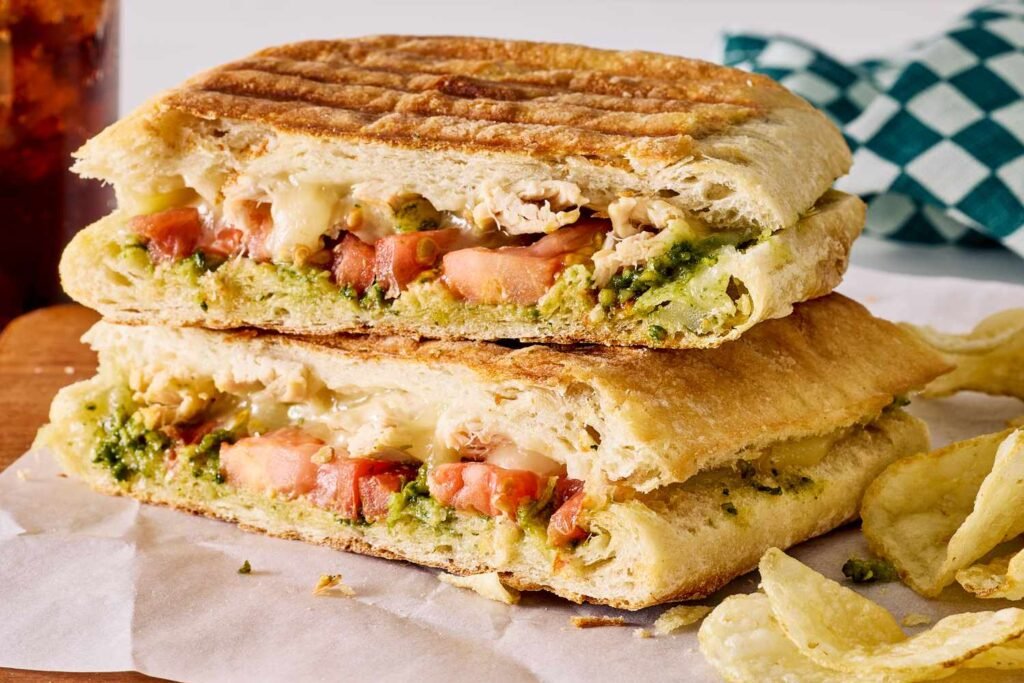
Chicken Pesto Panini
Focaccia, grilled chicken, provolone, pesto, and roasted tomatoes (patted dry). Add a little arugula after pressing for a fresh finish.
Mushroom and Gruyère Panini
Rustic loaf, sautéed mushrooms (cooked until dry), caramelized onions, Gruyère, and a small smear of garlic aioli. This one tastes incredibly “restaurant” with minimal ingredients.
Caprese-Inspired Panini (Without the Sog)
Use low-moisture mozzarella, sliced tomato (lightly salted and blotted), basil, and a thin layer of balsamic glaze or pesto. Keep tomatoes in the center, not against the bread.
Tuna Melt Panini Upgrade
Make tuna salad slightly on the dry side, add cheddar or provolone, and include pickles or capers for acidity. Press on sourdough for extra crunch.
Vegetarian Roasted Veg Panini
Zucchini, eggplant, roasted peppers, onion, and mozzarella or fontina. Add a spread like hummus or pesto, but keep it light.
Breakfast Panini
Bread with cheddar, scrambled eggs, and a thin layer of sausage or bacon. If adding tomato, use it sparingly and keep it away from the bread.
Expert Tips for Next-Level Paninis
Use Two Cheeses for Better Texture
A melty base (provolone, mozzarella, fontina) plus a smaller amount of a bold cheese (parmesan, goat cheese, blue) gives depth without sacrificing melt.
Season the Inside, Not Just the Outside
A tiny pinch of salt and black pepper on tomatoes, mushrooms, or chicken makes the whole panini taste more “complete.” If your fillings are bland, no amount of toasting fixes it.
Add Acid for Balance
Rich paninis need something bright: pickled onions, pepperoncini, a touch of mustard, a squeeze of lemon on chicken, or a thin layer of tangy spread.
Create a Crisp “Cheese Skirt”
For an advanced technique, let a little shredded cheese spill onto the hot surface near the bread. It fries into a crispy edge that’s outrageously good—just keep an eye on it so it doesn’t burn.
Don’t Overstuff
A panini should close comfortably. Overstuffing leads to uneven heating, sliding fillings, and bread that browns before the center is hot.
Shred Cheese When You Can
Slices work, but shredded cheese melts faster and more evenly, especially in thicker sandwiches.
Make It Ahead (Without Ruining It)
If meal prepping, assemble paninis without wet sauces and tomatoes. Wrap tightly and refrigerate. Add sauces after pressing or keep them in the center and very thin.
Common Mistakes That Ruin Paninis (And How to Fix Them)
Mistake 1: Cooking Too Hot
Symptom: burnt bread, unmelted cheese.
Fix: lower heat and extend cook time. In a skillet, medium-low often wins.
Mistake 2: Too Much Moisture
Symptom: soggy interior, steamed bread.
Fix: blot juicy ingredients, reduce sauce, choose low-moisture cheese, and preheat the press properly.
Mistake 3: Pressing Too Hard
Symptom: flattened panini with filling squeezed out.
Fix: gentle pressure. Let heat do the work.
Mistake 4: Wrong Bread for the Filling
Symptom: bread cracks, becomes too hard, or collapses.
Fix: match bread structure to fillings. Airy bread for melty cheeses; sturdier bread for juicy meats and vegetables.
Mistake 5: Skipping Rest Time
Symptom: cheese and fillings spill out when cut.
Fix: rest 1–2 minutes. You’ll get cleaner slices and a better bite.
Mistake 6: Unbalanced Flavors
Symptom: tastes heavy or one-note.
Fix: add acid (pickles, mustard), fresh herbs, or a peppery green after pressing.
Advanced Techniques: Paninis Like a Pro
Heat Zoning for Perfect Melt
If your press runs very hot, start with a slightly ajar lid for the first minute, then close fully. This reduces sudden compression and helps the cheese start melting before full pressure.
Preheat Fillings When Necessary
Cold, thick fillings (like leftover steak slices or roasted vegetables from the fridge) can slow down heating. Bring them closer to room temperature or warm briefly in a pan so the bread doesn’t overbrown while waiting.
Toast the Inside for Maximum Crunch
For extra crispness and a barrier against moisture, lightly toast the cut sides of your bread before assembling. This is especially helpful for tomato-heavy or sauce-heavy paninis.
Use Compound Butter for the Outside
Mix softened butter with garlic, herbs, or a little grated parmesan, then spread thinly on the exterior. It creates deep browning and a flavorful crust without needing extra salt inside.
Paninis for Different Diets and Preferences
Healthier Paninis Without Losing Satisfaction
Choose whole-grain sourdough or a hearty seeded loaf.
Use lean proteins like turkey or grilled chicken.
Pile on roasted vegetables for volume and nutrients.
Use strong-flavored cheese in smaller amounts so you don’t need as much.
Add brightness with lemon, vinegar-based slaw, or pickled veggies.
Gluten-Free Paninis
Use sturdy gluten-free bread that holds up to pressing. Keep fillings slightly lighter and avoid over-pressing, as gluten-free bread can crumble if pushed too hard.
Vegan Paninis
Use plant-based cheese that melts well, or lean into spreads like hummus and pesto-style blends (without cheese) for richness. Roasted mushrooms, caramelized onions, and smoky grilled vegetables add the savory depth people often miss.
Serving Ideas: What Goes With Paninis?
Paninis are satisfying on their own, but pairing them well turns them into a complete meal. For a classic café-style plate, serve with a crisp salad (something tangy like vinaigrette helps), a simple tomato soup, roasted vegetables, or a small bowl of marinated olives. If your panini is rich and cheesy, pick a lighter side. If it’s lean and veggie-forward, a creamy soup or potato side balances it.
FAQs About Paninis
What’s the best bread for paninis?
Ciabatta and focaccia are top choices because they’re sturdy and toast beautifully. Sourdough is also excellent for extra flavor and crunch.
Do I need a panini press to make paninis?
No. A cast-iron skillet or grill pan plus a weight works extremely well. The key is steady heat and gentle pressure.
Should I butter or oil the outside of the bread?
Either works. Butter gives deeper flavor and browning; olive oil gives a crisp, lighter crunch. Use a thin layer so it toasts instead of frying.
How do I keep paninis from getting soggy?
Preheat your cooking surface, blot wet ingredients, use low-moisture cheeses, and keep sauces thin and away from the bread when possible.
How long should I cook a panini?
Most paninis take 3–6 minutes on a press. In a skillet, plan for about 3–5 minutes per side on medium to medium-low heat, depending on thickness.
Can I make paninis ahead of time?
Yes, but assemble thoughtfully. Avoid watery ingredients and heavy sauces until after cooking. Wrap tightly and refrigerate, then press when ready.
What cheese melts best for paninis?
Provolone, mozzarella (low-moisture), fontina, Gruyère, havarti, and medium cheddar are reliable melters that taste great warm.
Why is my panini burnt outside but cold inside?
Your heat is too high or your fillings are too cold/thick. Lower the heat, cook longer, and consider warming fillings slightly before assembling.
Can I cook paninis in the oven only?
You can, but you’ll miss the signature pressed texture. If you only have an oven, bake the sandwich and press it down with a heavy sheet pan for some compression, then finish under heat for browning.
Conclusion: Make Paninis Your Signature “Anytime” Meal
Paninis are more than just a hot sandwich—they’re a technique you can master and adapt endlessly. Once you learn how to choose sturdy bread, control moisture, layer fillings intelligently, and manage heat, you’ll be able to build paninis that are crisp on the outside, perfectly melted in the middle, and balanced in flavor from first bite to last.
Start with one classic combination, make it exactly once, then tweak it like a pro: adjust the cheese, add a punchy acid, swap in roasted vegetables, or upgrade your crust with a flavored butter. In a world of complicated recipes, paninis are the rare win-win: fast, satisfying, and genuinely impressive when done right.